Analytics Pipelines
This page describes how you can create and configure an analytics pipeline. An analytics pipeline is the infrastructure that defines the database that will store the data that your application is generating (see Publishing Data) and creates the connection from the device running your application to that previously defined database. It is how you ensure your data is delivered to your private, secure location, and in a format that can then be queried for visualization (see Configure Visualizations or analysis. Let’s get to it.
Create a Pipeline
Analytics Prerequisites
In order to create an analytics pipeline, you need to have the alwaysAI CLI installed (see Development Computer Setup), as well as a valid alwaysAI application as defined in Anatomy of an Application.
Create Your First Pipeline
On your development computer, navigate to an alwaysAI application directory through your preferred terminal application. Run the following command:
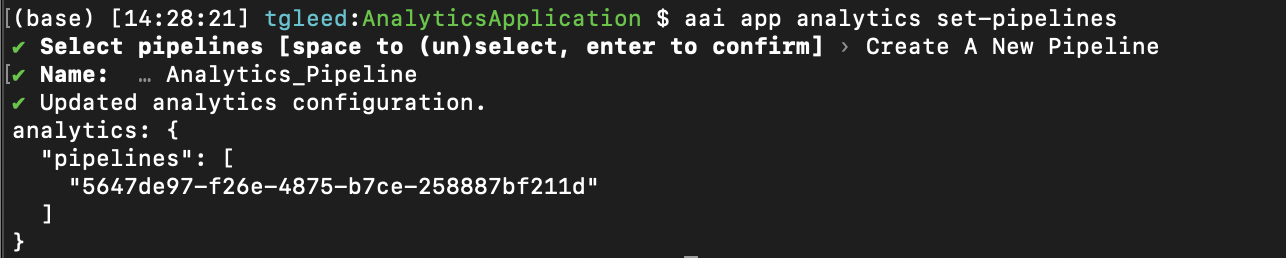
aai app analytics set-pipelines
This will bring up the workflow that will guide you through defining the analytics pipeline for this project. If there are no existing pipelines that you have access to, press the spacebar to select Create A New Pipeline. Once selected, press enter to bring up a series of prompts that will guide you through the process of creating a pipeline. If you have existing pipelines, you can still select Create A New Pipeline by pressing the up and down arrows until Create A New Pipeline is highlighted, pressing space bar to select it, then pressing enter.

You will be prompted to enter the name of your Analytics Pipeline. Choose a name that you will remember.

Press enter again to finish the process. A summary of the Analytics Pipeline(s) you have just configured will be displayed in the terminal. This configuration will also be added to your alwaysai.app.json file in your main project directory, which you can confirm by reviewing that file.
Note: This feature ‘overwrites' the pipeline settings in the alwaysai.app.json, so there are not separate ‘add’ and ‘delete’, just ‘set’. If you want to change the pipelines, use ‘set-pipelines' again, with a new list, which will replace the existing list.
Use an Existing Pipeline
Once you have created at least one pipeline, or have access to pipelines through your organization, you can select one or more pipelines to add to your project. This process is the same as creating a pipeline where you run the following command:
aai app analytics set-pipelines
The difference is that to select and existing pipeline you will press spacebar while highlighting one of the pipelines in the displayed list in order to select it. You can select any number of the existing pipelines and even the Create A new Pipeline option to create a new pipeline in addition to selecting existing pipelines. Once you press enter, your pipeline configuration will be displayed, showing the UUIDs of any pipelines you have selected.
Set Pipelines with Script
For advanced scenarios where you want to use a script to configure your analytics pipeline(s), the CLI command can take in the UUIDs of existing pipelines as flags. This will generate your analytics pipeline configuration and add it to alwaysai.app.json without needing to step through the CLI prompts.
An example of this usage is:
aai app analytics set-pipelines <uuid1> <uuid2> <uuid3> --yes
Where --yes skips interactive prompts.