Manage Data
alwaysAI’s Dataset Management is more than an annotation tool. Once your data is in the platform, you can search and filter it to review existing datasets and combine images and annotations from across datasets to make entirely new ones.
Dataset Workflow
The workflow we use to get from raw images to training dataset is:
Raw images are uploaded
Images are gathered into a collection
Collection is “published” as ready-to-train dataset
In order to be trainable, your images need annotations. These can be done to the raw images from the gallery view or from within a collection. The Collection is the last step before training your data; it is where you can clean your data, add or update annotations, and analyze your dataset details, like class distribution. Once you publish your dataset for training, it is immutable, and that version will be captured and stored as an object in your dataset table.
Gallery View

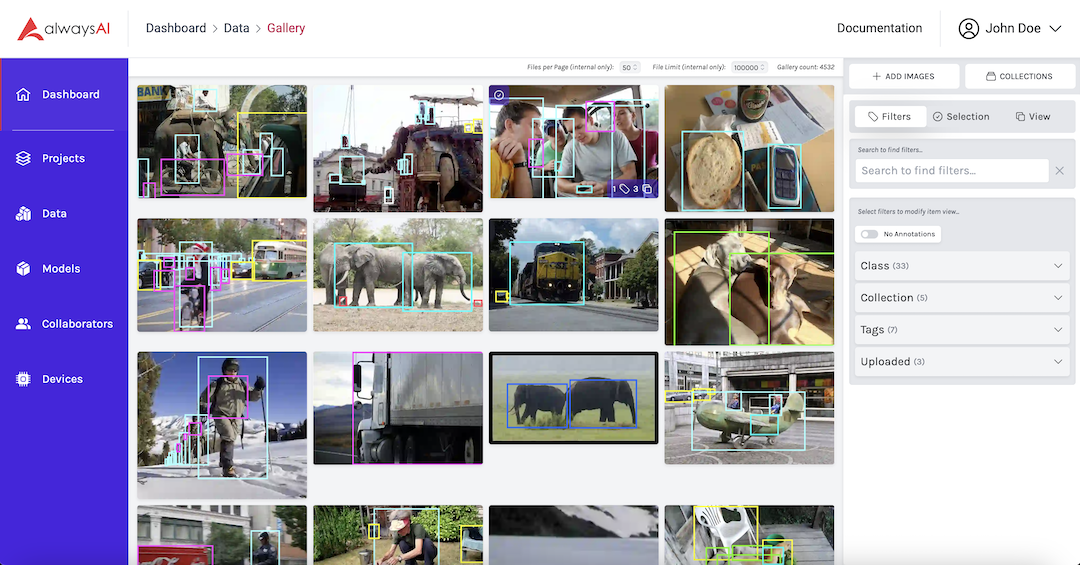
The Gallery is an interface where you can view and interact with all of the images that you have uploaded to Dataset Management. A thumbnail of each image is displayed, and when you hover the mouse on any image, an overlay of the number of classes or annotations, as well as the count of tags associated with that image is displayed. By default all annotations will be rendered directly in the thumbnail, but this can be configured in the view menu.
The count of all the images is displayed in status bar at the top of the thumbnail window. This count will update to reflect any filtering you do from the side menu. See more on this below.
If you click on an individual image, it will open the Single Image View of that image, which you can read about below.
Multiple images can be selected from the Gallery by clicking on the checkmark on the top left corner. Once you have selected one image this way, you can add images to the selection by clicking anywhere on an image thumbnail. Actions you can take on the group of selected images are described in the Selection section.
The side menu gives you tools for searching and filtering your images.

Search
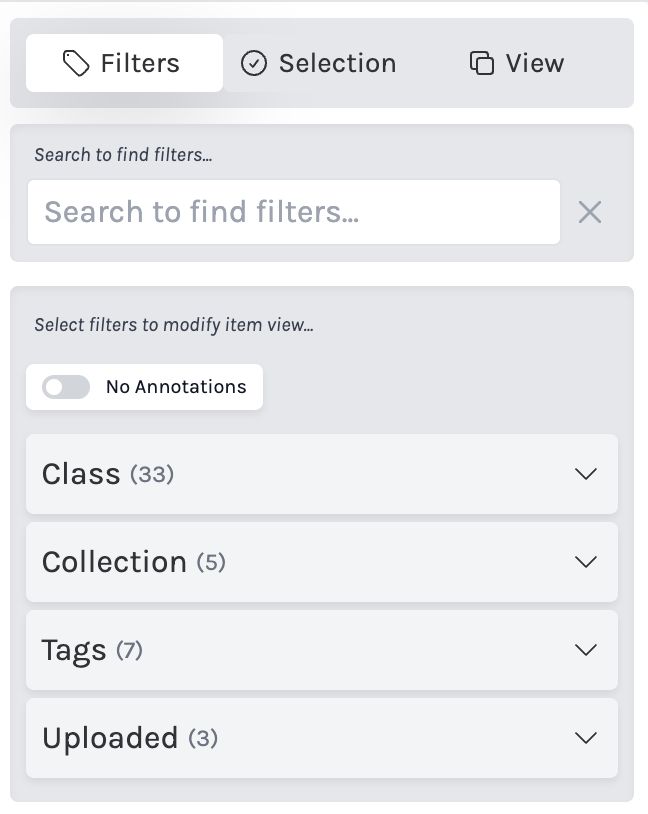
Use the search box to refine the filters that are displayed. Upon entering your search term, filters that match your entry will be displayed in the search results area below the search text box, and they will be automatically selected, thus filtering your images. The rest of the filter options will be reduced. Only filters that contain a filtered image are displayed. For instance, if your search term results contain a class, any collection that contains that class will also be displayed, but collections that don’t contain that class will be filtered, unless they also are part of the search results.
Clear the search by using the X next to the search box.
Filters
There are a number of different categories of filters for your images. Filters are additive, meaning if you choose more than one filter, any image that falls under either of your selections will be displayed. For all of the filters except No Annotations, which is a toggle switch, the filter is the list item. Click anywhere in the box that has the filter title and additional information, and the images will be filtered. When a filter is applied to your images, the check mark on the far right will turn from white to black. Click the filter box a second time to remove the filter. The total number of filters applied is totaled per category, and this count is displayed even when the filter category is minimized.
No Annotations
The most general filter is the No Annotations Filter. When this is selected only images that do not have any annotations associated with them will be displayed. This filter is turned off by default, click the switch at the top of the filter sidebar to toggle this filter.
Class
The class section of the filter sidebar contains a list of every label that is associated with the images you have uploaded. The number on the right side of the list item is the total number of occurrences of that class label. The color that runs along the bottom of the list item is the color that is used to render the bounding box for the annotations with that class label. This color is randomly generated and provides a way to distinguish and recognize individual annotations.
Collection
A collection is a group of images and annotations, and is the last step before publishing a dataset. We go more into collections on the next page, but here on the filter sidebar you can select a filter from this category in order to display images that are contained in a certain collection. Each list item has the name of the collection as well as the count of images in that collection. Since images can be a part of multiple collections, note that the sum of these numbers may be more or less than the total number of images in your gallery.
Uploaded
Every time you upload a batch of images to Dataset Management, the group of images included in that upload are captured in the Uploaded filter section. Each filter is named the date and time of the upload, so you can easily filter images by your last upload, or all uploads in the last month, etc.
Selection
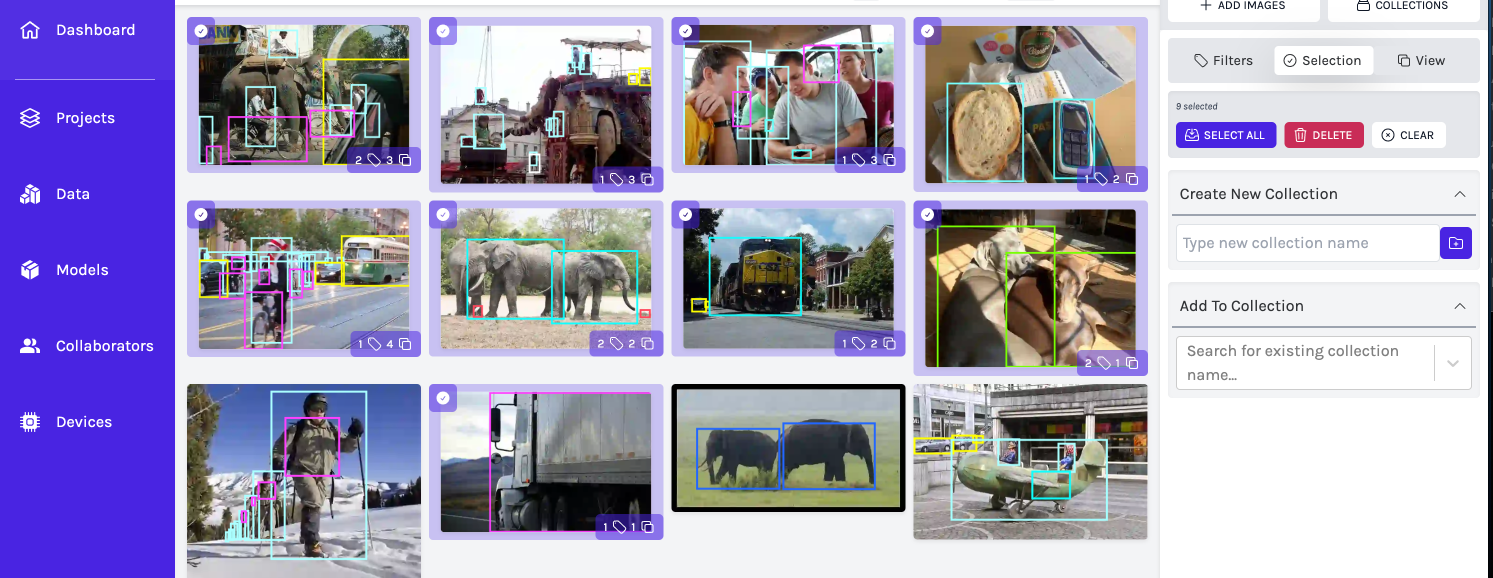
As mentioned above, you can select multiple by clicking on the checkmark that appears in the top left corner when you hover your mouse over the image. Once you have selected one or more images in this way, the sidebar menu switches automatically to the Selection tab. This tab provides actions that you can take on the currently selected images.

Select All
This button selects every image that is currently in your gallery workspace. So if you have used the filters tab to reduce the number of images that are within your workspace, as indicated by the Gallery Count on the top of the gallery view, Select All will only select those images that fit the filter criteria. If you have already selected images they will be included in your selection.
Delete
Remove selected images from Dataset Management. Deleted images will no longer be available to you.
Clear
Remove all images from your selection
Create New Collection
Use this area to create a new collection containing all images in your selection. Type in a name for your collection and press enter or the button next to the text input. Once the new collection is created you will be automatically take to the collection Detail screen, which we go into in more detail in the next section.
Add to Collection
If you want to add the selected images to an existing collection, simply select the collection name from the dropdown. If you have a lot of collections, you can use the search box to find the collection to add your selection to. Once you click Save to Collection, all of the images in your selection will be added to the specified collection.
View
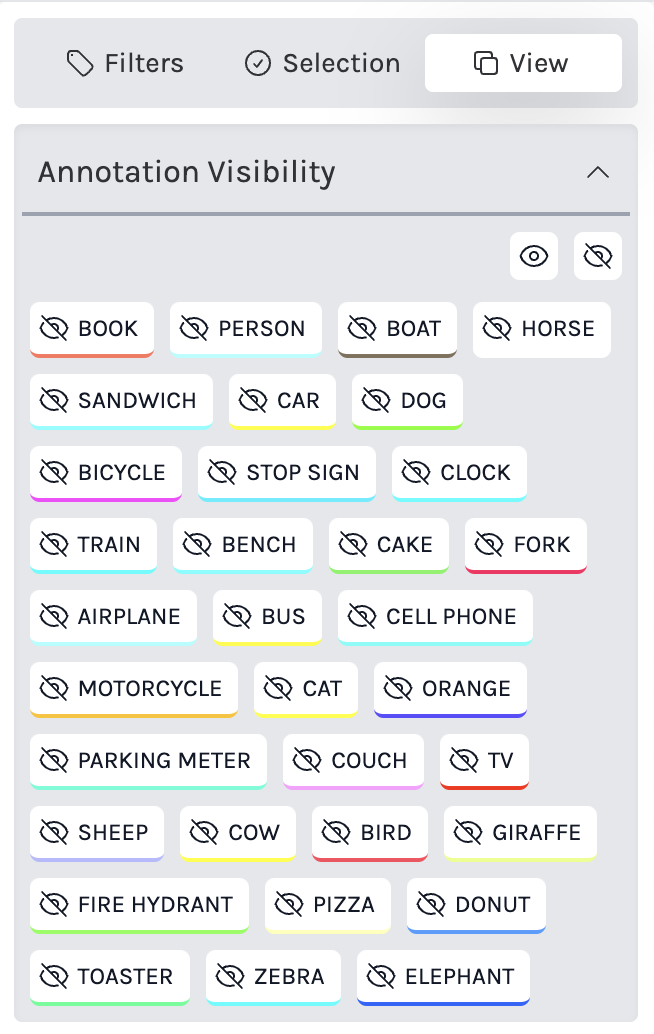
The View tab on the filter sidebar is where you can configure your visual settings. Currently this means annotation visibility. Turn all annotations on or off by clicking the eye icons on the top right. This will either remove the annotations that have rendered on top of images in the thumbnail view, or add them to the thumbnails. Additionally you can control annotation visibility on a per-annotation basis by clicking anywhere on a class label button.

Single Image View
If you click on a single image, you will open the Single Image View. This will open a large view of the selected image, and is where you can add or edit annotations, which you can find more information about Data Annotation Section. It is also where you find information about the image, including image metadata and tags associated with the image.
Details
You can see metadata for the image in the Details section. We have provided a few common fields, including Name, Type, Created, and Dimensions. Note that the Created field is the date that the image was upload to Dataset Management, not the date the picture was taken.
Tags
In the Tags section you can view tags that have been associated with this image. This is also where you will add new tags, or remove existing tags.